Add and export suppression emails
You will learn:
Learn how to add a recipient to the suppression list, and categorize the type of suppression. Also, how to export or remove suppressed email addresses.
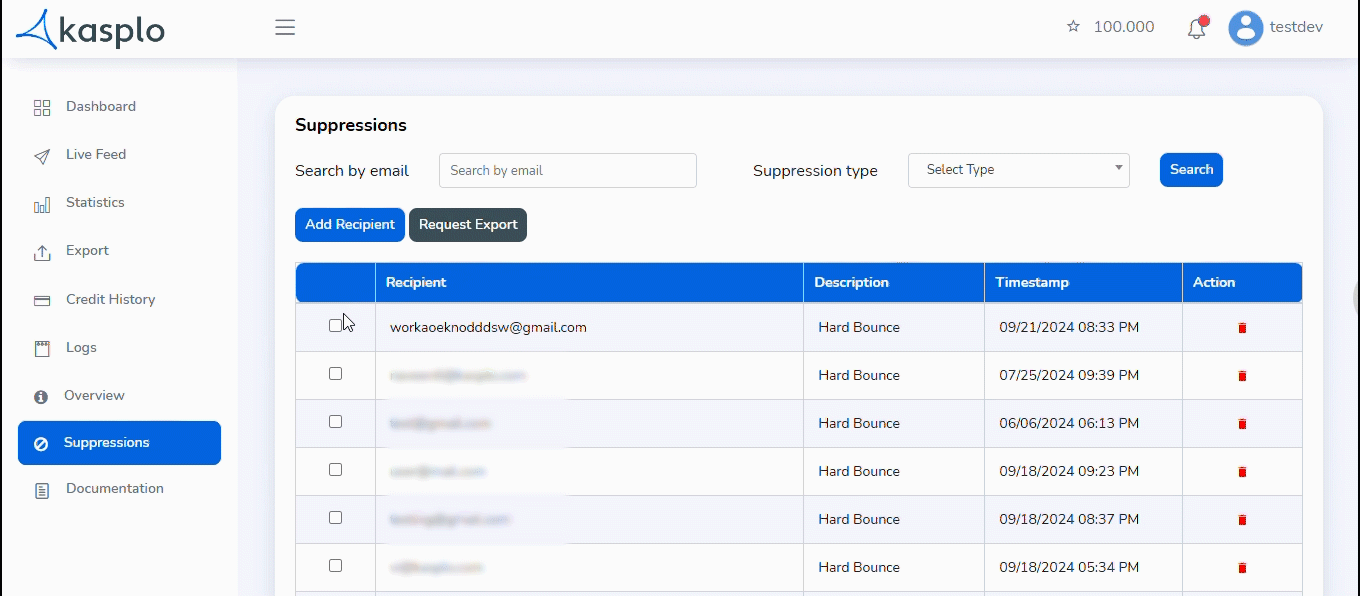
Step 1: Access suppressions
To access the suppression list, navigate to “Suppressions” from the Dashboard. Here, you will find all email addresses that have been suppressed during campaigns, along with previously added ones.
Each entry will display the type of suppression and the corresponding timestamp.
Step 2: Add recipient in suppressions
- Click on the “Add Recipient” button
- Enter the email address you want to suppress
- Assign the type of suppression from “Type” Dropdown
- Click on “Save” to suppress the recipient
Step 3: Export or remove the suppressed emails
Export: Search for the recipient > Select > Click on “Request export”. We will share the suppressed list personally in your email.
Or
Remove: Search for the recipient > Select > Click on “Remove Recipient”. The selected emails will be removed immediately.
- How to Import reviews using Kasplo Reviews?
- How to collect product reviews using Kasplo Reviews?
- How to change the look and feel of your review widget?
- How to collect picture reviews using Kasplo Reviews?