Create and manage suppression list
You will learn:
Discover how to create a suppression list and automatically manage subscribers by adding them to the subscription list.
How it works:
Create a list to exclude specific email addresses from your campaigns. Automatically add subscribers to the right list based on their actions, such as unsubscribes, bounces, or complaints. This approach helps you effectively manage your email outreach and keep your lists clean and targeted.
Step 1: Create a suppression list
To access suppression management, navigate to Dashboard > Settings > GLOBAL SETTINGS> Scroll down until you find the “Global Suppression List” under the “Seed List” section.
- Click “CREATE SUPPRESSION LIST”. Enter the name of the suppression list in the pop and click on “CREATE”
2. To add contacts to the suppression list, click the (+) icon in the Action column, then select “Add contacts”. Input the contacts and choose the appropriate category from the dropdown menu. Finally, click “SAVE”.
3. To bulk import data, click the (+) icon in the Actions column, choose “Import contacts,” upload your CSV file, and click “Save.”
Note: Download a sample CSV file by clicking here.
4. The number of emails added to the list will be displayed under “Number of IDs.” Next to that you can also check the status (Active/Inactive) of the list.
5. To export the seed list, click again on the (+) in the Actions column. Select “Export,” and the list will be downloaded in CSV format.
6.You can also view and delete the list from the Actions (+).
You can automatically add contacts to the appropriate suppression list based on their actions.
Step 2: Manage the suppression list
- Scroll down to the “Global Auto Subscriber Management” section below the “Global Suppression List”, from there you can auto-manage your suppression lists.
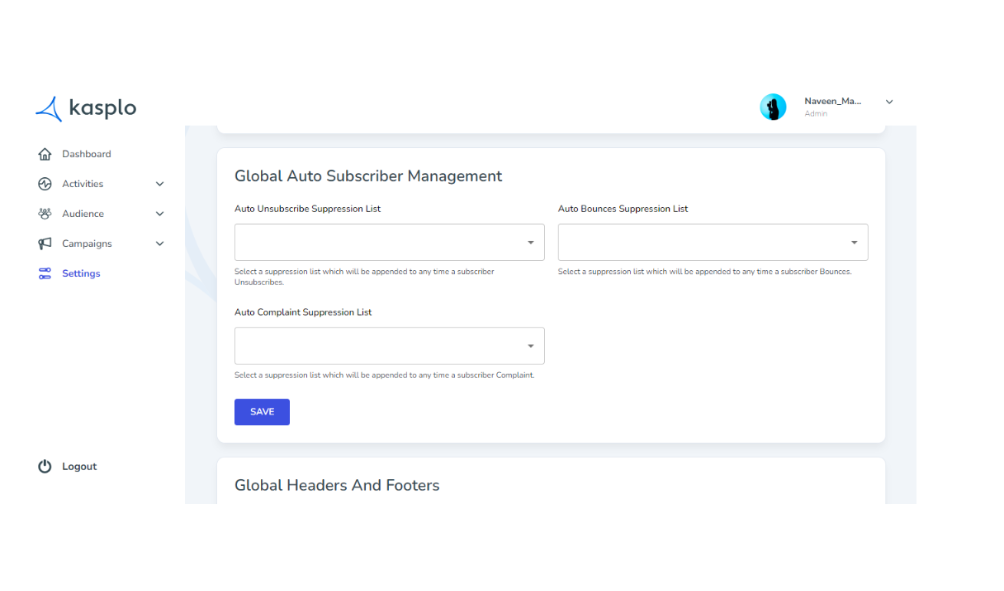
2. You can automatically manage actions like unsubscribes, bounces, and complaints by adding those contacts to the appropriate suppression lists.
3. To do this, select the “Auto Unsubscribe Suppression List” option and choose the list where you want to add your unsubscribe contacts automatically. This ensures that whenever a contact unsubscribes, they are added to this list, preventing future emails from being sent to them.
4.Select the “Auto Bounces Suppression List” option and choose the list where you want to add your bounced contacts automatically. This ensures that whenever a contact gets bounced, they are added to this list, preventing future emails from being sent to them.
5.Select the “Auto Complaint Suppression List” option and choose the list where you want to add your complaint contacts automatically. This ensures that whenever a contact spam complained, they are added to this list, preventing future emails from being sent to them.
6. Once lists are added, click on “Save” to automatically assign contacts to their appropriate list.
- How to Import reviews using Kasplo Reviews?
- How to collect product reviews using Kasplo Reviews?
- How to change the look and feel of your review widget?
- How to collect picture reviews using Kasplo Reviews?