How to add a coupon ?
You will learn:
Learn how to create/add static and dynamic review coupons.
Before enabling a review coupon email, you need to create or add a coupon in your Kasplo Reviews dashboard.
Step 1: Access coupon creation
From Dashboard > Settings > Coupon > Click on “Add Coupon” on the top-right corner to create/add a coupon.
Step 2: Create or Add a coupon
- Enter the coupon name in the “Coupon Name” text box you wish to create.
Eg: Site review coupon, Product review coupon, Picture review coupon, etc.
2.Choose the expiry date of the coupon from the “End Date” section.
3.Select the type of coupon you want to create: “Static” or “Dynamic” under the “Coupon Type” section.
Static: A single coupon code that all recipients can use.
Dynamic: Unique codes will be shared for each recipient.
4.If you select “Static,” enter the coupon code you created on your eCommerce platform in the text box. On selecting “Dynamic,” you need to upload a CSV file with the dynamic coupon codes so that each recipient receives a unique code.
Click here to download a sample CSV file.
5.“Enable” or “Disable” the coupon using the “Status” option. When enabled, the coupon will be active and available for use. When disabled, the coupon will be inactive and not usable by customers.
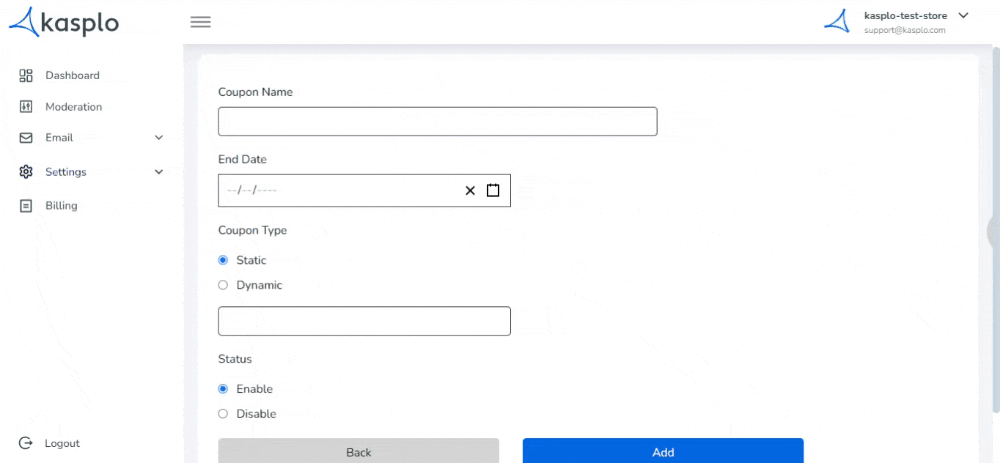
5. Click on “Add” to save the coupon you created.
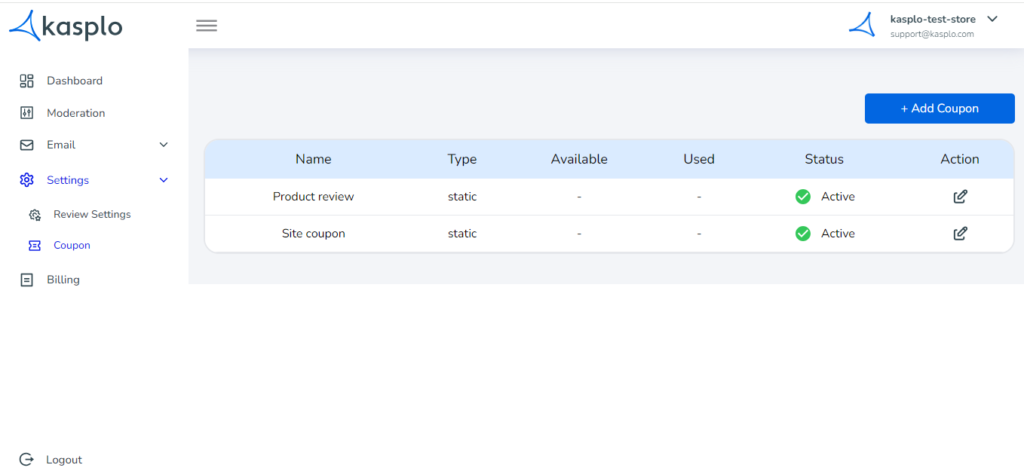
Step 3: Manage and edit coupons
To access the created coupon, go to the Dashboard and navigate to Settings > Coupon. Here, you can view all your created coupons, check their status, see how many recipients have used them, and edit the coupons as needed.
Refer the help article to learn how to send this coupon to your customers when they share a review.
- How to Import reviews using Kasplo Reviews?
- How to collect product reviews using Kasplo Reviews?
- How to change the look and feel of your review widget?
- How to collect picture reviews using Kasplo Reviews?